


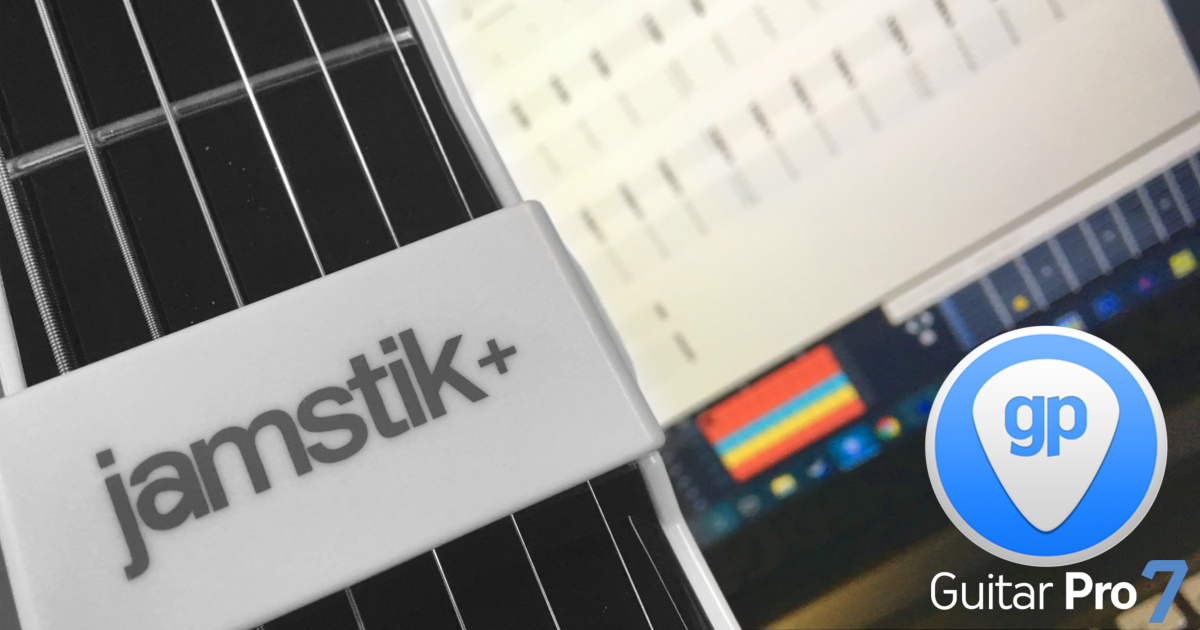
Have you ever wanted to score your own composition or riff? If so, Guitar Pro 7 from Arobas Music allows you to do exactly that for guitar, bass, drum, or keyboard using tablature and/or standard notation!
Think of Guitar Pro like your musical sketch pad to build songs, transcribe riffs & refine your musical creations.
Since the jamstik+ is a class compliant MIDI controller that integrates with MIDI-compatible programs, including the latest version of Guitar Pro, this means you are able to connect the jamstik+ via either Bluetooth, or hardwired USB—just set up your session & start tabbing out your ideas!
This is a convenient way to enter in a large amount of MIDI data—like full chords or single-note melody lines—all via a familiar guitar interface. Keep in mind you will have to adjust the note duration, but this method of data entry literally cuts your workload in half opposed to the manual note-by-note data entry method!
Getting started:
1) Install Guitar Pro 7

(skip this step if already installed)
2) Connect the Jamstik+ via BLE by using Audio MIDI Setup (Mac) or plug & play via USB (if your device does not support MIDI over BLE—check out this list of compatible devices)
3) Launch Guitar Pro 7
IMPORTANT NOTE: Make sure to connect the jamstik+ prior to launching GP7 otherwise it won’t see the jamstik as an option for a controller.
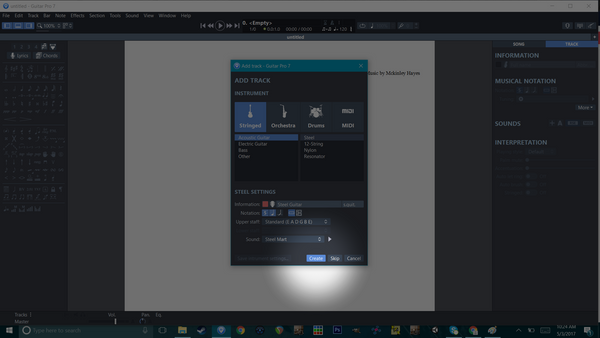
New file > Steel String Guitar > Create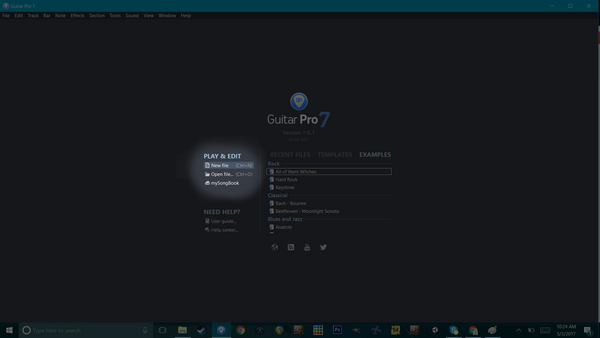
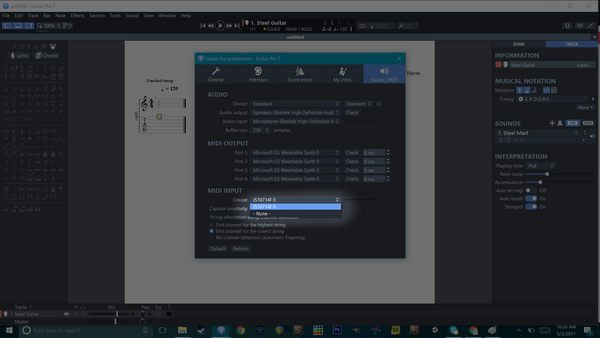
4) Enable the Jamstik+ as a MIDI input
Enable the jamstik as a MIDI device in File -> Preferences -> Audio / MIDI -> MIDI input -> Select Jamstik Serial ID -> Close out of the Preferences window
5) Enable “MIDI capture”
Go to Sound -> Select MIDI capture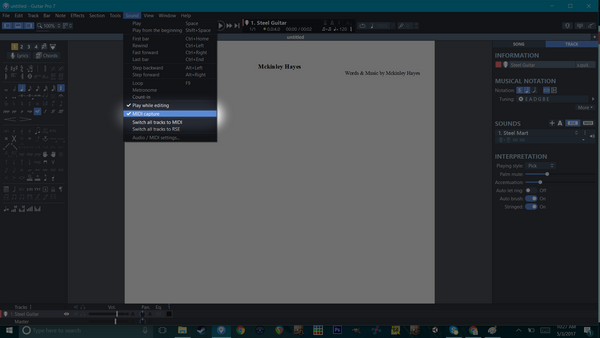
6) Play & watch the tab roll in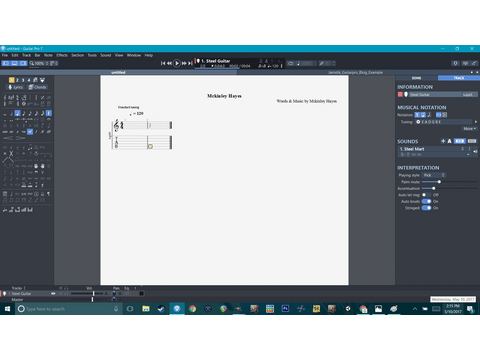
Strum a few chords and watch the tab appear!
Note: This entry method is not real-time, however, it is a convenient solution opposed to typing every note by hand!
7) Edit rhythmic values
Once you have entered the tab data, the next step is to edit any rhythmic nuances that your piece may require.
An effective way to edit the rhythm is by using the ("+" ,"-") buttons on your keyboards numpad to subdivide or double the value of the note duration.
Keep in mind this step is not always necessary depending on the rhythm that you want. For instance, if you have a straight 8th note pace you can skip this step.
8) Insert a new track & repeat steps 1-7 as desired
Repeat this process as desired for additional tracks and continue until you're satisfied.
Example:
A) Rhythm Guitar:
For the sake of keeping things simple, I kept the rhythm guitar track at a quarter note pace & chose a simple two-chord progression. Keep in mind that since MIDI entry is not done in real-time, you are able to set the threshold of the note entry window in the preferences. This allows you to enter chords & notes simply by playing them step-by-step without having to type each note via keyboard.
The wider you set the threshold, the more amount of time you have to enter additional notes before advancing to the next.
B) Lead Guitar:
For the lead guitar track I simulated going up the neck by using the "+1 Octave" feature on the jamstik's D-pad (+1 up button) to enter in the notes in as if I was playing the 12-17 fret range.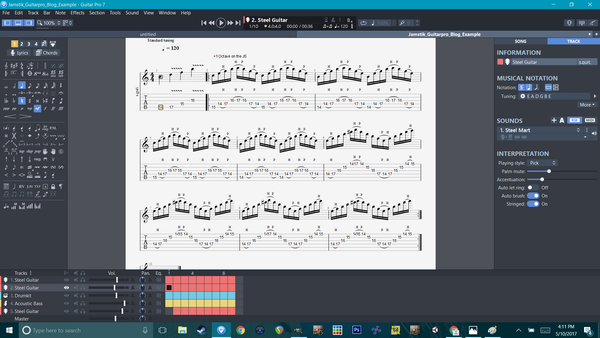
Drums:
For the drums you will want to "-1 octave" using the d-pad's "Down" button to reach the kick on MIDI note C1 - (A string, 3rd fret) and the snare (A string, 5th fret) the rest of the drum mapping can be found in the drum notation window (Fret display icon in the upper right hand corner).
Bass Guitar:
Entering the bass guitar requires that you either set the lowest string to the 1st string of the bass by adjusting this setting in the Audio / MIDI preferences menu OR by simply playing the top 4 strings.
------------------------------------------------------------
**Helpful Tip: Use the D-Pad to navigate your note range on the jamstik.
Here are the hotkeys.
D-pad commands:
Up / Down: Adjusts +/- 1 Octave (+/- 2 octaves max)
Left / Right: Adjusts +/- 1 Capo
Hold Enter: Tap Mode Momentary
Up + Down: Tap Mode Toggle
Left + Right: Soft reset (resets the jamstik to it's default "home" position)
(For a full tutorial on the jamstik's D-pad commands click here, or watch the short video below)
------------------------------------------------------------
Note on exporting MIDI Files:
After you've tabbed out your creation, you can export the MIDI data & import it to any DAW of your choice to really bring the composition to life!
-------------------------------------------------------------
Our friend Dave Tran from GuitarZero2Hero demoed the jamstik+ in action with Guitar Pro 6
Check out the video below to see the integration in action!
*Note, there will be minor interface differences between Guitar Pro 6 and the latest version of the software, but it's typically the same functionality.
Click the banner below to purchase Guitar Pro -
Or click this link

P.S. Guitar Pro is an affiliate partner, which means if you purchase, Zivix may get some cash money—any earnings are invested into expanding third-party integrations & improving our products and app offerings! Thanks.
Leave a comment
Comments will be approved before showing up.
Also in Jamstik Blog


Using a Jamstik MIDI Guitar with Analog Hardware


Using Logic Pro to Create Guitar Tabs with a Jamstik MIDI Guitar

