
Have you ever wished each string of your guitar could be assigned to different instruments or plugins? With the Jamstik MIDI Guitar, this dream can become a reality since each string on the Jamstik has its own MIDI Channel! By splitting MIDI channels, you can process each string independently and harness the full potential of your creativity—crafting intricate melodies and harmonies with ease.
Splitting MIDI channels on your Jamstik MIDI Guitar is simpler than you might think. Whether you're a seasoned producer or a novice in the realm of music production, our step-by-step tutorials will guide you through the process, ensuring you make the most out of your musical endeavors.
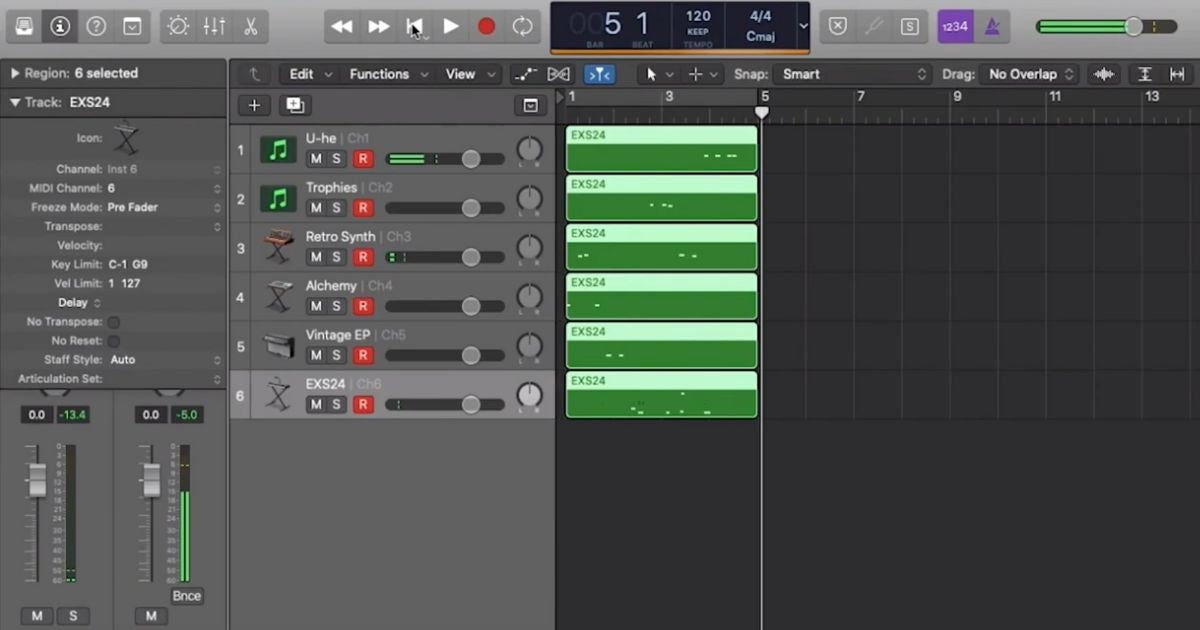
Here's a little snippet of what you can achieve by splitting MIDI channels!
Tutorials (with video instructions) for Specific DAWs:
- Ableton Live: Link to Tutorial
- Logic Pro: Link to Tutorial
- Studio One: Link to Tutorial
- Reaper: Link to Tutorial
- Pro Tools: Link to Tutorial
How to Split MIDI Channels:
-
Connect Your Jamstik MIDI Guitar: Start by connecting your Jamstik MIDI Guitar to your digital audio workstation (DAW) of choice. Ensure that it's recognized and ready to transmit MIDI data.
-
Access MIDI Channel Settings: First, double check which MIDI mode your Jamstik is in using Jamstik Creator or Jamstik Control. You'll want to be in either Multi-Channel or MPE mode. Then navigate to your DAW's MIDI settings and locate the option to manage MIDI channels. This is where the magic happens, allowing you to assign each string of your Jamstik MIDI Guitar to a unique MIDI channel.
-
Assign Instruments or Plugins: If you're in Multi-Channel mode, the Jamstik should be mapped to channels 1-6. If you're in MPE, the first channel is reserved for global messages, so you'll want to map the strings to channels 2-7. Once you've split the MIDI channels, it's time to assign instruments or plugins to each channel. This opens up a world of possibilities, from layering different sounds to creating intricate compositions.
-
Fine-Tune Your Setup: Experiment with different instruments, plugins, and MIDI channel configurations to find the perfect setup that suits your creative vision. Don't hesitate to explore new ideas and push the boundaries of conventional music production.
Ready to unleash your creativity? Follow our tutorials and discover the endless possibilities of splitting MIDI channels on your Jamstik MIDI Guitar. Whether you're composing intricate melodies, layering rich harmonies, or experimenting with new sounds, the power is in your hands.
Make sure to tag us on social media @jamstik so we can see what you're inspired to create!
Share:
Jamstik Brings the MFC1 MIDI Floor Controller to NAMM 2025
Using Logic Pro to Create Guitar Tabs with a Jamstik MIDI Guitar