Beat the Tariffs — 20% off at checkout

Menu
Jamstik
0
  • How It Works
  • MIDI Guitars
  • MFC1
  • Software
  • Shop All
  • Sign in
  • Find a Store
  • Your Cart is Empty
Jamstik
  • How It Works
  • MIDI Guitars
  • MFC1
  • Software
  • Shop All
  • 0 0

How to use the Jamstik+ in Ableton Live - Free Ableton Patch Download

How to use the Jamstik+ in Ableton Live - Free Ableton Patch Download

June 17, 2016

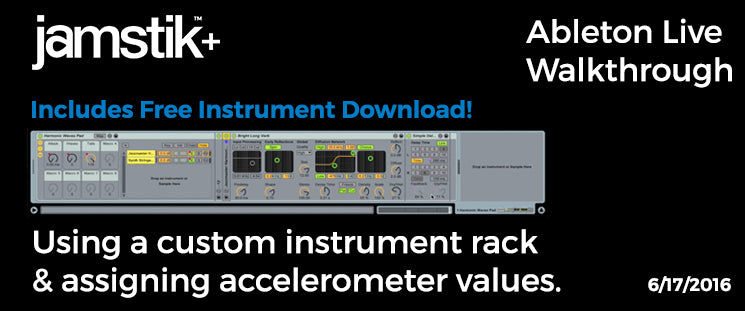
Hi I’m Chris Heille, the Senior Music Product Specialist w/ Zivix, the makers of the jamstik+. I’ve been working on developing some tools for jamstik+ users working with Ableton Live, and I want to show you a cool sounding Instrument Rack you can download to try yourself. A really cool bonus to this rack is how you can map some of the macros to the accelerometer of the jamstik+ for a killer sounding delay effect.
Watch the video below or follow along with the transcript, we hope you enjoy!

This Instrument Rack is named Harmonic Waves Pad, and it’s composed of two instruments in Ableton Live - Sampler in one chain and Analog in the other. (Demo) The bulk of  the sound consists of pizzicato harmonics played on a Fender Jazzmaster and run into Eventide’s amazing Blackhole Reverb plugin, and then mapped in Sampler. Analog is just providing a sine wave pad that masks the tail of the harmonics samples. There’s some reverb in each chain of the rack, and additional subtle delays. 
If we solo the Sampler you can hear the Jazzmaster and Blackhole components. Then you can see I’ve added some additional reverb and delay. Soloing the Analog chain you can hear the sine pad w/ reverb and delay.
Looking at the Macros, I’ve assigned Macro #1 (which I’ve labeled Attack) to extend the attack time of the amplitude envelope of the Sampler. This will change slow the attack past the pluck of the string on the samples and make the whole patch sound more like a keyboard pad, but it still gets all of those cool harmonic tails and the color of Blackhole.


Macros 2 & 3 basically do similar things to the reverb and delays in each chain. Macro 2 (labeled Waves) adjusts the color of the noise oscillator of Analog, and both the Feedback and Wet Dry Balance of the Ping Pong delay in that chain - it’s labeled Waves because it kind of sounds like waves at the beach.

Macro 3 (labeled Tails) adjusts three parameters in the Simple Delay which will create an endless delay when you dial it up. The three parameters are Delay Time, Feedback, and the Wet Dry Balance.


Now, let’s do something really fun, let’s MIDI map the jamstik+’s accelerometer to Macros 2 & 3. Before we do that though, let’s make sure the accelerometer is set up so it’s useful. I’ll disconnect from the Mac and connect to the jamstik+ app on an iPad to dial in the accelerometer. 


The accelerometer controls are accessed from the button on the main screen here. (show) Once open it you can see how to turn it on and set the range. Slide the Enable tab, leave the default MIDI Controller Number to 102 (it’s usually a conflict free CC#) and then set your minimum pitch angle. Hold the jamstik in your usual playing angle and click Set. Then move the jamstik into a vertical position and hit Set on the Max pitch angle. This should give you accelerometer values that are very low or near zero when you’re playing normally, but climb to high values as you move the jamstik into the vertical position. Cool.


Let’s reconnect to Ableton Live. I’ll use Audio MIDI setup to reconnect to the Mac, and once connected I’ll open Live’s preferences and select the jamstik as an input port for both tracking and remote input. Now let’s map the accelerometer - leaving the jamstik in the neutral playing position, click the MIDI Mapping button, then click Macro 2 “waves" and move the jamstik into a vertical position. We’ll do the same for Macro #3 “tails” - and you should be set up so the accelerometer controls both Macros moving from neutral to vertical. (demo)


This Harmonic Waves Pad patch is available for free download below. Just click download, enter your information and we will generate a download link for you. Give it a try in your own Ableton Live sessions and see what interesting performances you can make. If you’re not using a jamstik+ and want to find out more we encourage you to explore the jamstik.com website!


  • Share:

4 Responses

Chris Heille
Chris Heille

February 21, 2019

Hi, Chris Heille here from Zivix. To get your Jamstik connected to Ableton Live as an available MIDI controller you’ll need to first connect the Jamstik to your Mac or PC. For Bluetooth connections on the Mac there’s two good YouTube resources to view: https://youtu.be/XDovlG0tUEI, and an update specifically for Macs running Mojave https://youtu.be/KjKrK4lkZgo. If you’re not using Bluetooth, connecting via USB will accomplish the same connection MIDI-wise. Once connected, the Jamstik should appear in Live’s Preferences>Link MIDI tab. For PC connections this isn’t quite as universal of a process, so I recommend connecting via the USB cable and going through whatever Windows peripheral connection process you’d do for any other MIDI controller over USB, and then the Jamstik should be available in Live’s Preferences>Link MIDI tab. Once the Jamstik is available in Live’s Preferences>Link MIDI tab you’ll want to select the Jamstik as a MIDI Port Input, and at least activate the “Track” status to On. Leave “Sync” off, and “Remote” can be toggled to “On” if you intend to use any of the Jamstik’s D-pad buttons or Mute switch as a learned MIDI controller in Ableton Live.

Chris
Chris

February 21, 2019

This is confusing and not helpful as the previous comment stated. His/her reply was helpful in that I didn’t know where to go inside Ableton, but when I got there, the drop down doesn’t list Jamstik as an option for a MIDI device. So I am not sure what to do here.

Meredith Cannon - Jamstik Team

September 28, 2018

Hey Gordon,

After you get your Jamstik connected to your computer via Audio MIDI setup, check out this video to see the connection process in Ableton: https://youtu.be/n3WrGUqNBLQ?t=25

If you have any other tech questions, our team is always happy to help troubleshoot or answer any questions. We can be reached via Live Chat on the bottom right-hand corner of jamstik.com, or you can submit a ticket to jamstik.com/support

-The Jamstik Team

Gordon
Gordon

September 28, 2018

The video neglects to explain how to set up Jamstik in the preferences Link MIDI dialog which is the only thing I wanted to know!

Leave a comment

Comments will be approved before showing up.


Also in Jamstik Blog

Using a Jamstik MIDI Guitar with Analog Hardware

February 10, 2025

The Jamstik MIDI Guitars are class-compliant MIDI controller, so you can use them to control any of your hardware gear that accepts MIDI-input! In this demonstration, we'll show you how to control KORG's Electribe 2 Sampler Groove Box with the Studio MIDI Guitar.

Read More

Using Logic Pro to Create Guitar Tabs with a Jamstik MIDI Guitar

February 01, 2025

Have you ever wanted to export your tracks into guitar tablature? As long as you have Logic Pro and a Jamstik, you will be able to take advantage of this quick workaround to turn your MIDI data into tablature!

Read More

Splitting MIDI Channels on the Jamstik

January 29, 2025

Have you ever wished each string of your guitar could be assigned to different instruments or plugins? 

Read More

Customer Support

  • Support
  • Returns
  • Documentation
  • Find a Store
  • Submit Support Ticket
  • support@jamstik.com
  • (612) 225-0096

Company

  • About Us - Zivix
  • Careers
  • Press
  • Military & EDU Discounts
  • Privacy Policy
  • Terms of Service

Community

  • Blog
  • Education
  • Facebook Community
  • FAQ
Follow

Subscribe to the Jamstik Newsletter

© 2022, Zivix LLC